Nanshy Professional Makeup Brush Set Review
Hey My Lovelies,
I hope your week has had an exciting kick off. When it comes to makeup, I love to use brushes. Gone are the days when i used my hands to apply makeup and i have never really enjoyed it because it could get very messy especially if you are like me and you have very little time in the morning to makeup before heading out to work. My default mode is to reach for my favourite brushes which are always at hand. I may use my hands to warm up the product but I mostly use brushes.
Finding the right kind of makeup brushes is another kettle of fish altogether as the good quality ones are ridiculously expensive and the cheap ones are bad quality. However, a few brands have been able to bridge the gap of producing high quality brushes which are affordable and easily accessible. Nanshy Brushes, although new comers to the market, are one of the few makeup brush brand that ticks all the boxes when it comes to producing soft high quality, affordable and cruelty-free brushes. I was very excited when i received the Nanshy Professional Makeup Brush Set* because i had read many good things about them. In the set, you get a 5 brushes which include a Flat Top Buffer Brush, Flat Angled Buffer Brush, Round Buffer Brush, Angled Buffer Brush and Tapered/Pointed Brush. Let's get started..
Brief Background on Nanshy Brushes
Nanshy Brushes are a UK-based Makeup Brush company and their brushes were launched in 2012 after some years research to ensure they produced high quality brushes that provides a seamless and flawless finish of makeup products on the face. According to the Nanshy Website, they strive to bring products that have been researched extensively to ensure only the best quality is produced. Apart from that, they have gone the extra mile to ensure their brushes are vegan-friendly, have not been tested on animals and are PETA approved. I think that's amazing! Nanshy brushes promise high quality brushes with a price you can smile about which i will agree with but don't take my word for it...Let's find out together if they back up their claims well.Meanwhile, be sure to follow Nanshy Brushes on their Twitter and Facebook as they always have exciting discounts especially for this festive season.
The Nanshy Brushes at a glance
The Nanshy Brushes have white pearly handles which is really different to all other brushes i own and i like that because it makes them stand out against the rest. White is a beautiful colour and it just makes the brushes look more expensive than they are. The handles are quite chunky which makes for a good grip and better control of the brushes. Although they are chunky, they are actually really light so there is no stress when using them. I have read a few reviews where people were a little concerned by the white colour because they felt it will get dirty which may be true, however, the pearly glossy finish to the handles makes it really easy to clean and they would only be dirty if you probably don't take care of them or clean them regularly. Cleaning your makeup brushes should not be compromised at all because your skin will not thank you for it. At All.
Packaging
I love the packaging; it's nothing too fancy but it is realistic. The outer packaging is black with some instructions at the back on what brushes you receive, how to use the brushes and contact details of Nanshy Brushes. All the brushes are well protected individually with a clear packaging which helps preserve its shape although I don't think the shape can go amiss because the brushes are very densely packed.
The Flat Top Buffer Brush
The Nanshy Flat Top Buffer Brush is my favourite brush from the whole set hands down. It has a flat top as the name implies which means it has a large surface area to work on and blend in makeup products easily and flawlessly. I use this for both foundation and powder because i really like how smooth it caresses my skin..(did that sound dirty?!!)..lol but seriously, it really blends in my foundation really well. I also use it for my powder and it helps deliver a flawless finish. This brush is very multi-tasking for me which is why i love it although I have reserved it for powder because it picks up more product and spreads it really easily.
The Nanshy Round Buffer Brush
The Nanshy Round Buffer Brush really reminds me of the Real Techniques Buffing brush because they both have the dome shape which helps in buffing makeup products like foundation into the skin for a smooth finish. This is what i use for my foundation because it is really easy to use and the finish is always amazing. At first, i experienced a little difficulty in buffing my foundation on my face (no thanks to the tiny hairs on my face) but i realised this because I was applying a lot of pressure on the brush. All it needs is a light and easy application and the foundation sinks in smoothly and seamlessly. It can also be used to apply cream blushes as well.
The Nanshy Pointed/Tapered Brush
This would be ideal for applying foundation for some but i prefer round or flat brushes for foundation because i feel they give a better finish. I reserve the Nanshy Pointed/Tapered Brush for concealers and some areas with foundation that are hard to reach by the other brushes like the corners of my nose and near my eyes. At first, i was thinking its pointed tip appeared big/large for concealer but when i tried to use it, it was actually fine. You can even get away with using it for blending for your under-eye concealer but you should have applied it with your fingers first (which by the way seems to be the best way for under eye concealer to avoid creasing) as the pointed tip seems to big to pick up concealer.
The Nanshy Flat Angled Buffer Brush
I use this for my bronzer and contouring. It really hits all the right angles of my face nicely and we all know contouring is all about getting the right angles of your face. For bronzing, it works like a dream and really gets the precise angles of your face while you can blend it out with the soft bristles for an even finish.
The Round Angled Buffer Brush
I use the Nanshy Round Angled Buffer Brush for applying my blush and it is one of the brushes in the set which holds a special place in my heart. I really can't get over the softness. It really picks up the product really well but it may retain some instead distributing it. After a while, i discovered, it is best to use a light hand and build it up as you go along (or may be it was the blush i used). Its angled shape really helps in getting the apples of your cheek and cheekbones as well which is why i love it.
The Brush Hairs/Bristles
They are made of synthetic material which are very densely packed in a Kabuki-like form which really helps in even distribution of your makeup product on your face. I love that they have white tips like many brushes are going for these days because it helps you know when the brushes need a wash and it also allows you see that they are clean after they have been washed. It always comes in handy! The brushes are by far one of the SOFTEST brushes i have ever used. I dare say they may be softer than the ever popular Real Techniques Brushes. HonestlyI tested the brush on my my friends and they were so shocked at how soft these brushes were; it's the most amazing feeling and if you are lazy to put on your makeup, trust me the softness will ginger you to do it.
Application
I find that they pick up the product really well since the bristles are densely packed easily which is very good so you don't have to worry yourself about wasting your makeup product. It really helps blend out the product really well and provides a flawless finish. To be honest, i don't blend in too much when using these brushes because i find that they do the job with minimal effort. However, I noticed with my blush that it picked up the product really well but it did not distribute as well as i would have preferred but it was fine with all the other products like foundation, powder and bronzers.
Shedding
So far, I have experienced no shedding which is really good because i would have expected some stray bristles to come loose especially with how densely packed they were. To my surprise, it did not happen even after washing which i think is really amazing. I have to say i have had them for under a month so time will tell and i will be doing a comparison with other brushes after a few months have passed.
Washing
This is extremely important to me when i am looking out for brushes because i like brushes that wash easily and dry quickly as well. I had some fears with this because i was thinking these bristles are tightly packed and may take ages to get dry. I washed them with some baby shampoo and water and they all came clean in one wash...I was excited :-)) although I still washed it a second time due to my OCD ways. Drying time was really fast as well and it was almost the same time as my Real Techniques drying time which is definitely one of the quickest drying brushes i have come across. Again, i did not experience any shed hairs which is music to my ears. The handles have not come loose and the silver finishing that holds the brush parts together has not rusted or changed colour which is brilliant.
Cost and Stockists
Although, I was sent this for a review, I would definitely buy this in a heartbeat for many reasons. Firstly, they are classy and beautiful! I mean just look at how pretty they look..Apart from the aesthetics, they are very good quality for the price being paid and they can definitely be classified as professional brushes which is what they are in the first place because they deliver a flawless finish to the face. The Nanshy Makeup Professional Brush Set* retails for £34.95 which may sound steep compared to the Real Techniques Core Collection but you are getting 5 brushes instead of 4 which are of very high quality and it almost works out the same. Alternatively, you can buy the brushes separately which is wonderful especially if you just need one particular brush or you want to test it out before plunging into the whole set. There is also the Nanshy Eye Brush Set and the Nanshy Luxury Set which is so beautiful and comes in a classy white clutch which you wish can just be converted to a clutch but alas! it's a makeup brush holder. Honestly, it's divine!! You can buy the Nanshy Brushes from Ebay, Amazon.co.uk, BeautyStore4U, Madame Cosmetics (Italy), Amazon.de(Germany), Amazon.fr (France) and they are working on shipping worldwide.
Cons
Of course, we all know everything cannot be 100% perfect as everything still needs to be continually improved to always achieve excellent results.
1. The brushes are not individually named so it will be a bit difficult for beginners to know what brush to use. For the pros out there, it may not be a biggie but i think it will be brilliant if brushes had their individual names embossed on it just like Nanshy Logo is.
2. They are only available online for now which means you can't walk into your local beauty/drug store to buy them. I am one of those people that want to see and if possible touch the brushes before buying them and if they are only available online you can only rely on honest bloggers and pictures. However, i guess since they are a fairly new company, they will be working on it soon to stock in some shops.
3. If you don't like densely packed brushes, the Nanshy brushes may not be for you because they are densely packed and although many people like it that way(i know i do) but I understand that some others may not.
5. The white colour may be problematic if you are not one to wash your brushes frequently (you naughty person! you know you should wash them regularly).
Verdict
I LOVE THEM!! I am impressed by the quality of the brushes and there are whole lot of reviews on these brushes on Amazon (they are not bloggers by the way!!) because they are really amazing. They are so soft and they do the job really well. Guys, if you are reading this and your girlfriend likes makeup, you should pick this up for them. Make sure you thank me later because they will definitely love it. I am going to get the Nanshy Eye Brush Set because I am impressed with the face brushes and I am positive they will deliver the same quality. You can buy the Nanshy Brushes from Ebay, Amazon.co.uk, BeautyStore4U, Madame Cosmetics (Italy), Amazon.de(Germany), Amazon.fr (France) and they are working on shipping worldwide. That's it folks. I know this was a really long post with gazillion of pictures but I love to give a good review and show the product as well as i can so you can make your own opinion...See you in my next post!!
*I received these brushes to review but my opinion remains mine and I have not been compensated in any way to give a positive review. I always include the Pros and Cons of a product because I believe no product is 100% good or bad.
Labels:
Brushes
.
Fashstyleliv
.
Makeup
.
Nanshy Brushes
.
Nanshy Professional Makeup brush
.
Review
Wednesday 27 November 2013
Zara Office City Bag Review
Hey My Lovelies,
I hope you had a smashing weekend. It's been a while since i put up a fashion post..i think the last one was in August during the African Fashion Week London*gasps* that's ages ago. Well, today i am going to be talking about one of the most coveted bags from Zara especially here in London and some other parts of the UK- The Zara City Bag. Just take a look at this beauty..isn't it gorgeous.? Zara is definitely hands down my favourite place to shop when i have an extra bit of money because they have very good quality items ranging from Bags, shoes, clothing and even home ware. Zara Bags are definitely, for me, the best high street brand bags. Not just me as many ladies here in the UK, particularly London, have this bag and it has indeed being the Cult Bag for a while now. I believe it was fashioned after the the Chanel Executive Tote but i am not sure and i don't really care because this bag is E.V.E.R.Y.T.H.I.N.G!! It still looks the same as when I bought it a year ago. I and my lovely sister were doing some Christmas Shopping by this time last year and she spied on this bag in Zara in Trafford Centre Manchester. We both fell in love instantly but they had only one so, like the good sister I am, I let her buy it and placed an order in store for mine to arrive a few days later. When I picked it up, I could not wait to fit in all my daily essentials in it.. For More Zara Bags/Purses, see this post on the bags and purses I picked at the Zara January Sales (2014)
Basics of the Zara Bag
The outer material is made of Polyurethane. let's just call it Faux Leather because it is not real leather but it is very sturdy. It feels really smooth and strong which it is meant to be because it is always loaded for me. It has various compartments and two handles which you can carry the bag as a proper hand bag; maybe in the crook of your elbow. When it becomes heavy, you can switch to the longer handle which it comes with. The inside of the bag is lined with a rich purple/burgundy Polyester material which gives it an excellent contrast. There are also some gold plated (i am not quite sure but it looks like it) accents all round the bag which include the zips, zippers and metal handles.
Compartments
As an Office City Bag, it is definitely packs the punch with its numerous compartments which makes it my ideal bag for working in the city or if you are a student as it can hold all the essentials you need in school. It has three outer compartments which are on both sides of the bag with a middle section. These compartments are very roomy which means you can fit in quite a bit inside. Just looking at it, it looks like it has just three compartments complete with zips until you delve deeper.When you get inside, there is another mini section which is padded which can be used to protect your Ipad or tablet or any small device you have. I don't have any so i store a few random things there. On the other side, you have a card holder section, a phone holder and a small zipped section for maybe some tiny things like keys or any bits and bobs. The middle compartment is also padded so if you feel up to it, you could put your laptop in it...Good luck with that as the bag becomes diabolically heavy.
Cost
This was bought last year as previously mentioned and I got it for £49.99 let's just say £50 because i have no use for that 1p. It is definitely one of the best £50 i have ever spent and i absolutely love this bag. I am not sure if Zara still make them but you can check the website for it. It's meant to be in Size M(Medium) and i just had a peep on their website and it was unavailable but they have the Mini Version of the Zara Office City Bag in other yummy colours which looks really tempting. The good thing is, it costs only £29.99 which is a bargain if you do not like the idea of a heavy bag. I have found a few dupes on ebay but none comes close to the real thing so i won't be recommending any.. :-(
Verdict
I love this bag very much and it has served me well and i am not ready to let go of it any time soon. It is so sturdy and retains its box-like shape which i love. i am not really a fan of soft or collapsible bags for no reason. It serves its purpose as an Office City Bag as it is perfect for fitting everything you want for your day in the city especially if you are an office worker or a student. The bag without anything inside is heavier than your average bag so beware if you like to load up your bag as it can become really heavy. On the plus side, you can classify that as your work out for the day as lifting heavy weights e.g. heavy bags count as a work out too.. :-)). I also wish it had the Zara Logo in Gold embossed in front just to give it some character but I guess less is more...or not?
I hope you have enjoyed this post and do you have the Zara Office City Bag or a similar dupe? let me know in the comments section. Would you like to see a What's In My Bag Tag? let me know in the comments box below....See you in my next post..x
Labels:
Fashion
.
Fashstyleliv
.
Office City Bag
.
Zara
.
Zara Bag
.
Zara Woman
Monday 25 November 2013
Winter Essentials: The Hand Cream
Hi My Lovelies,
I am super glad it's Friday and deep down i feel this week has gone really fast! If you remember last week when i put up a post on Winter Essentials-Lip Savers, I promised a follow up on Winter Essentials-The Hand cream Edit. So I am keeping to my promise. The weather here in London has taken a super dramatic turn and it sets to be getting very cold by next week and we may even have a zero degree temperature next week. I am totally dreading that but i will definitely be prepared.
My hands are another part of my body that get really dry without notice which is why i am always armed with Hand creams both in my hand bag and on my desk at work. I think another reason may be the heating system in the house when it is freezing. Of course, everyone loves heaters because they leave you really warm but they also have some adverse effects on your hand and skin in general by dehydrating and taking off all the natural body moisture which may lead to dry hands and sometimes cracked skin. To prevent that, I always reach for my two favourite hand creams:
Neal's Yard Remedies Power Berry Daily Moisture
I received this sample as a magazine freebie during the summer and i believe i have featured it in a small post over here. It is not your typical hand cream because it is a daily moisturiser for the body as a whole but its compact packaging means it has to be converted to a hand cream which is very easy to sue. At first, i did not really like the fragrance because it smelt very organic(I am totally rubbish in describing scents/fragrances) but the fragrance grew on me with continuous usage and i really like it now. Packed with Anti-Oxidant rich Acai berry, Bilberry and Goji Berry, the Neal's Yard Power Berry Daily Moisture is perfect in ensuring your hands are well moisturised and hydrated. I love the way it sinks into my skin effortlessly and ensures it remains soft although it is a little bit watery which means you need to be careful so you don't waste it I only need to reapply sparingly as it really works well and i love it. This has a permanent place in my bag.
The Body Shop Almond Hand and Nail Cream
Now this is a proper hand cream as it is designed to be a hand cream. I also got this free from the Body Shop sometime in September via VoucherCode.co.uk who had a code which entitled you to one Body Shop Hand cream you fancied so i quickly snapped up this offer like i always do. I picked up the Almond one because i think Almond has some moisturising properties and it has a nice smell. I really like this one because it is suitable for both my hands and my nails. Yes, I apply some on my nails every now and then (does anyone else's nails grow faster during the Winter? Mine does) and my nails love it as it strengthens them somewhat. Compared to the Neal's Yard Power Berry, i find the texture of the Body Shop Almond Hand and Nail Cream a little bit thicker which i prefer as it means there is less waste. This also sinks in easily without the associated annoying greasy feel that some hand cream leave behind. The only thing i am not a fan of is the packaging. It gets really squishy because it comes in a metal-like tube and it can get really messy in your bag if the lid comes off and it can come off. This stays on my desk at work and i take it back during the weekend for my table at home.
That's it folks. i hope you have enjoyed this little post. Have an amazing weekend and i will see you in my next post...toodles..x P.S. What are your favourite hand cream during the winter?
Labels:
Beauty
.
Fashstyleliv
.
hand cream
.
Neal's Yard Remedies
.
Skin care
.
The Body Shop
.
Winter Essentials
Friday 22 November 2013
How to take care of your Weaves/Hair Extensions
image source: http://www.rehairducation.com/ |
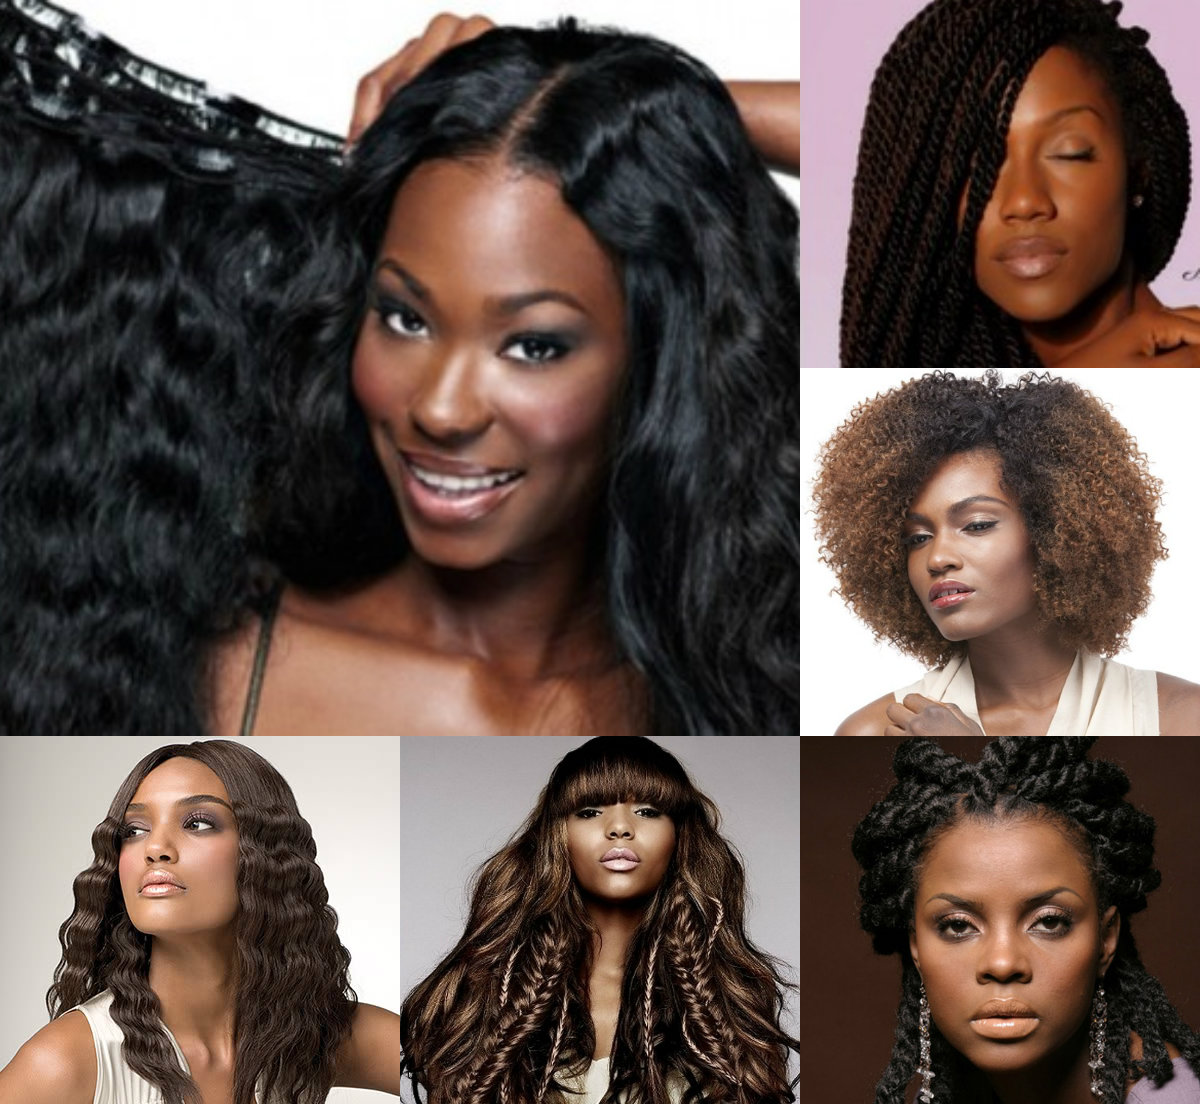
I hope your week has been beautiful. I have been wearing hair extensions for almost 10 years on and off now and it is one of the easiest ways to switch up my style while letting my natural hair grow as much as possible. In the past 3 years, I have been wearing human hair extensions or weaves because they are more natural looking and last for a really long time. They have not been cheap at all and their prices depend on what length you choose which is why i always take care of my weaves/hair extensions to ensure they last for a really long time and look healthy while they are installed on my hair. A lot of people think they do not have to take care of their weaves but that's wrong; that's the only way to preserve it and ensure it looks healthy. I daresay you may have to take care of your weave almost as much as your natural hair...ok, a little bit close but you get my drift. I am going to share a few tips that have worked for me to ensure my weaves are always in top form year in year out...
image source: http://www.madamenoire.com |
Great Quality Weaves
image source: www.naturalhairrules.com |
A good style would help maintain your weave for a long time. I prefer to install low maintenance styles that requires minimal manipulation. If you have to pull, tug, brush and comb your hair to frame the style every morning then it would be too much tension both for your natural hair and your extension which is not very good. Furthermore, when you manipulate your extensions every time, you stand the risk of experiencing shedding no matter how tightly wefted the extensions are or how well you sealed the wefts.
image source: www.dimpleshair.com
Invest in Good Quality Hair Essentials
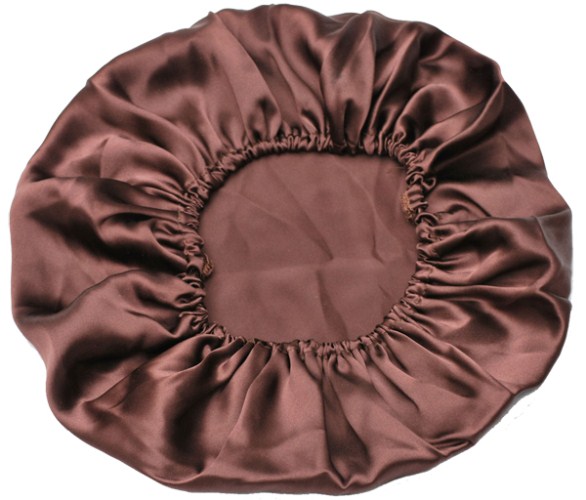
Again, I prefer to keep it simple. When i have a weave, i make sure i have the following tools at hand: A wide toothed comb, a smaller comb, a brush (optional), a silk bonnet, a shower cap and bendy rollers. I prefer to use a comb for my weaves compared to a brush but that's just my preference. At night, i give my extensions a good comb-through and put it in two pigtails and secure the ends with a non-grip hair tie and put on my silk bonnet and that's it. I prefer a silk bonnet because it protects the hair from any snags while sleeping and it preserves its natural lustre and shine. In the shower, I put on a shower cap in order to prevent water getting to my weave as that's not very good especially when i am not washing my weave afterwards. If i want curls, I use my bendy rollers overnight protected in the silk bonnet and i go to bed to wake up to lovely heat-less curls.
image source: www.mamiverse.com |
Minimal Heat Application
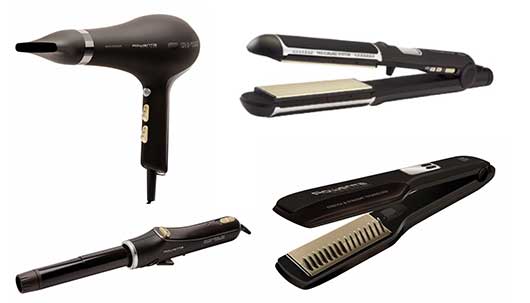
Many people use heat almost everyday on their extensions and they wonder why their extensions look dodgy after a little while. Applying heat consistently to any kind of hair (both your natural hair and your extensions) has never been a good thing. Constant heat applications through curlers and straighteners would only add to eventual collateral damage to your hair extensions. Sometimes, it can even change the texture and the soft silky feel of lovely hair extensions may even disappear forever. I know it can be fun with the rollers, curlers and straighteners but it should not be done too often. With my extensions, i only apply heat to them once in two weeks (I am lazy like that) except i am in dire need of a different look for an occasion. You can always get curls using bendy rollers or even pin curls with thousands of tutorials for heat-less curls on YouTube.
image source: www.nadsbeautyspot.blogspo.com |
Weekly Washing and Conditioning
Quite a few people find it really hard to wash their hair extensions while it is installed on their hair hence they do not wash it at all or go to the salon to have it "expertly" washed. oh well!! I know it could be a bit challenging but i wash my hair every week usually on Saturday evening or Sunday afternoons. I don't pour water from the top of my head or anything of the sort instead I part my hair into two sections and take down the shower head so i am in control of the direction of the water. I don't scrub or heavily manipulate while washing; i just use my fingers in a downwards stroke to massage the hair extensions with some shampoo to get rid of any product build up or dirt, repeat on other side and rinse off. Then, I proceed with my conditioner, let it sit for a few minutes with the same downward stroke and rinse off. Most times I air dry (which is why i wash on days i am not going out) or if i am impatient, I would blow dry with my dryer on low heat. My favourite shampoo and conditioner is the Herbal Essence Hello Hydration Range which is amazing and leaves my hair extensions really soft and back to its original soft silky state.
image source: www.drugstore.com
Moisture, Natural Lustre and Hair Products
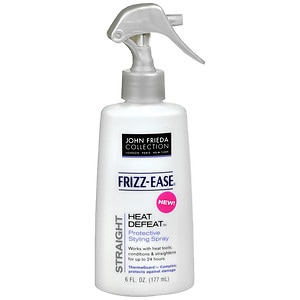
As a rule of the thumb, i prefer not to use a lot of products on my hair extensions as i find it weighs it down a lot and it makes it look really limp and dull. If i feel my hair extensions are dry, i lightly apply some serum (John Frieda's Frizz Ease Serum) lightly between my hands and massage it evenly around the hair extensions. Honestly, this is the only product that my hair extensions actually need and it helps restores its shine and natural lustre. If i have to apply heat to my hair extensions, I always use a heat protectant before i apply heat.Again, my favourite one is John Frieda's Frizz-Ease Heat Defeat. I ensure the heat protectant is fairly dry before applying the heat because applying heat to damp hair is an absolute no-no!
image source: www.feelunique.com |
Colouring and Bleaching your extensions
I am not against colouring or bleaching hair extensions, in fact, it is one of the ways of switching up your extensions in a bid look different if you feel bored already. I have bleached, dyed, coloured and ombred most of my hair extensions and it has always been fun. If you buy good quality hair extensions, you won't have to worry about any extensive damage to them. However, once you apply any of these chemical processes to hair extensions, you must always condition your hair extensions for a longer time to ensure it still retains its natural lustre and texture. When i bleached and "ombred" my hair extensions, i conditioned it for almost 15 minutes every week and my hair extensions were super soft. Of course, you don't have to condition for that long but i did it because i just felt like. Most times, these chemical processes could expose your hair extensions to dryness, brittleness and sometimes shedding so it is very important to condition and apply some serum if need be. I know this was a longer post than most of my recent posts but i hope you have enjoyed it. Even if you do not wear hair extensions, you can still apply some of these steps in taking care of your natural hair. See you in my next post...toodles...xx
Labels:
brazilian weave
.
care of weave
.
fashstylelv
.
Hair
.
hair care
.
taking care
.
Weave
Thursday 21 November 2013
Versatile Blogger Award- Fashstyleliv has been nominated!
Hey My Lovelies,
I hope everyone's week has been going fine so far. I love doing tags and being nominated for blogging awards is even more interesting because it gives you a chance to do something fun, let your readers know more about you and feel appreciated. So, I felt very delighted when the lovely Paula from ThirteenThoughts nominated me for the Versatile Blogger Award. You need to check out her blog here because she has a wide variety of amazing blog posts ranging from Beauty, Fashion, Girl talk, Lifestyle, Health & Fitness and Relationship. What I love most about her blog is how beautiful her photography is because I am a huge sucker for lovely pictures...so go ahead and show her some love from me...
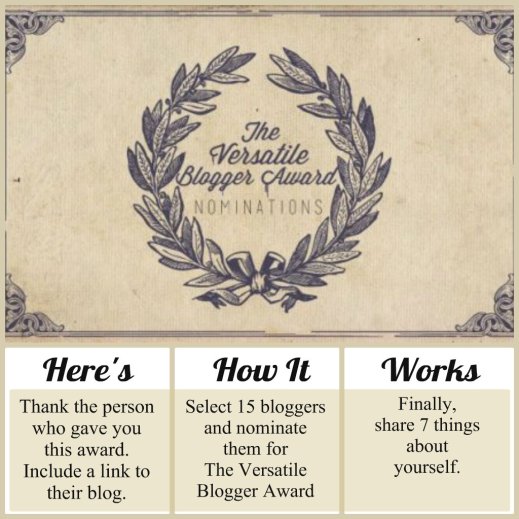
What is the Versatile Blogger Award?
It is essentially an award given to you by other bloggers for writing blog posts which have touched and inspired them one way or the other, having good quality photographs and having unique contents and subjects. It is an award designed to honor a blogger who has brought something special to your life. I think it is so amazing to know someone out there actually loves my blog posts enough to feel inspired or touched. To me, that's the whole essence of blogging. Thanks a lot Paula...xx
How does it Work?
It's very simple and requires no fuss which is why it is why it is an amazing award. It has a few rules as outlined below:
1.Display the Versatile Award certificate on your blog
2. Announce your win/nomination and thank the blogger who nominated you.
3. Present 15 bloggers with the awards, link your nominees in this post and leave them a comment on their blogs so they know they have been nominated.
4. Post 7 interesting things about yourself.
7 Interesting Things about myself
I am not sure i consider them all very interesting but i would let you be the judge of it. I would treat it as a way to learn more about me so here goes...
1. Beyonce and I..we are best mates...No seriously, we are.. (hehehehehe)..ok, you got me!..but i so wish it was true though. I am totally obsessed with her and i really love her, her music and her passion which is all very inspiring.
2. I am very mischievous and I always play a lot of pranks on my close friends, family and partner. They are totally used to me now and there is no escape for them...hehehhe
3. I still can't drive..I know, I know it is really bizarre but i promise it is somewhere on the bucket list before I hit the big 30.
4. My Iphone and I are inseparable..it is the first thing i pick up in the morning and the last thing before bed. I honestly love it and I know there are so many people who do the same...No? Just me...ok!
5. I sleep really easily and Insomnia is something i have never suffered from. Once my head hits the pillow, it's a snoozefest. No, you won't catch me sleeping on the train, tube or bus but you may catch me having a nap in a car journey....bwahahaha.
6.If I go into a public toilet, say in the office, mall or anywhere, I won't use the toilet if I see the toilet seat and rim is down and covered because i will assume there is a nasty big turd in there. Ewww!!
7. I love to write anything..be it a list of things to do, an assignment, an address, anything at all, i would write it down on paper first..I am old school like that..
There...that's 7 interesting things (I hope!) about me and i hope you have enjoyed it and if you have any interesting things about yourselves, please be my guest in the comment section, i would love to read it and if we share any of the above, let me know as well.
Nominating Bloggers for the Versatile Awards
I am not sure if i am able to nominate up to 15 bloggers but let's see how things go. Without further ado, i present to you my nominations for the versatile blogger awards for bloggers who i find their posts inspiring and amazing!!!
1. Shirley.B. Eniang from Meek and Mild (http://www.meek-n-mild.com)
2. Anna from ViviannaDoesMakeup (http://www.viviannadoesmakeup.com)
3. BeautyCrush from BeautyCrush (http://www.beautycrush.co.uk)
4. Barbara from Barbara &1923 (http://www.barbara1923.com)
5. Dinma from That Igbo Chick (http://www.thatigbochick.com)
6. Beth from Bird's Words (http://www.birdle.blogspot.co.uk)
7. Ifeyinwa from LoveIfeyinwa (http://www.loveifeyinwa.com)
8. Adeola from She Got Her Own (http://www.distinguisheddiva.blogspot.co.uk)
9. Sophie from The Private Life of a Girl (http://www.theprivatelifeofagirl.com)
10. Vicky from Koko Secrets (http://www.kokosecrets.com)
You should check them all out because they are all amazing blogs and add them to your reading list...Thank me later..I hope you enjoyed this post and I will be seeing you in my next post..xx
*None of the images used in this post are mine and if you would like me to give credit (assuming it is yours originally), send me an email and it will be done, thanks.*
Labels:
blogger award
.
Fashstyleliv
.
tags
.
Versatile blogger award
Wednesday 20 November 2013
Natural Hair Update: Protective Styles for maximum hair growth
Hi My Lovelies,
It's been a little while since I last updated this blog about my hair journey and it's simply because I got lazy. Having natural hair can be very rewarding but it requires a lot of hard work and sometimes, I just get really lazy and can't be really bothered. I had some braids for about two months from the end of July to mid September and I took them out.
Normally, I only leave my hair out for a day or so before braiding it again or putting it into a protective style but this time, I just left it out for a week or so. Boy! was it stressful? I had to do my hair every morning which is something I never stress about with my braids or any other protective style but I liked the challenge because I could play with my hair.
Honestly, I am very low maintenance when it comes to my hair. I decided to make a U-Part wig (just sewing some extensions on a wig cap and leaving out some space for your real hair). I made two; A straight yaki-like extension one and a curly one. I really liked the curly one because I did not have to manipulate or damage my hair with any heat.
U-Part Wig Straight Yaki
I just got 2 packs of very inexpensive hair extensions from my local beauty store and made a U-Part wig attached with some wig clips. I have a beautiful mannequin head which has been featured here earlier in the year. I got a wig cap (I like using the dome cap) and sewed on the extensions and attached the wig clips to the perimeters to attach to my hair. It took me about 2 hours to make it because I was lazing around the house as well. I washed my natural hair, conditioned, put in some corn rows and attached the wig. The good thing about clip-on U-part wigs is the fact that you can take it off every day and give your hair some air ;-) which is what I did. I left very little leave-out but it still did not blend it; so I bought a headband and voila! I was sorted and my hair saw no heat..
U-Part Curly Wig
I actually really liked this wig a lot because it is closer to my natural hair texture which means I did not have to do any blending in. All I did was make the U-Part wig, corn row my hair and sewed the wig down around the perimeter of my head. I did not use the clips this time around. Then, I applied some gel (Eco- Styler Gel) to my leave out and added a few bobby pins so it stayed flat. Once dry, it looked amazing and some people thought it was my natural hair. *grin* .The only downside to this method is it was sewn down so my natural hair did not get much air or moisture and the gel application was getting messy and annoying so i had to take it down and wash it. The weave itself was not very good quality so before you could say "Fashstyleliv", it was tangling and the curls were looking a bit dodgy. That marked the end of the era of the curly wig although I really enjoyed the look.
The Brazilian Weave with a Closure
After all said and done, I closed my eyes, went to get some really nice weave from Khairmax Beauty which has really amazing weaves. I got a 12-inch closure (Brazilian) and two bundles of 14 inches (Brazilian) and 1 bundle of 16 inch (Brazilian).I think the amount i paid for my purchase was fair because the Khairmax hair quality is outstanding and it feels ever so soft. To top it off, i already had a Khairmax Beauty card which entitled me to a 10% discount which comes in really handy when you are spending a lot. I think their hair closure is one of the best i have tried as the parting looks very realistic and i didn't need to bleach the knots and it matched my scalp excellently.
I proceeded to book an appointment in one of the most sought-after Afro Salons in London-Honey Hand Salon and decided to get my hair laid. Getting an appointment was a different story and they were fully booked but I was placed on a waiting list (yeah, you read that right) and l was luckily offered a place due to some cancellation. I had heard so many good things about Honey Hand Salon and I expected only the best. I went to the one in New Cross Gate and it was amazing.
I met the owner Hannah Balogun who actually fixed the weave and closure. I was really amazed and impressed by how professional they all were in the salon. One of the hair dressers took down my corn rows and washed my hair which felt so good as my scalp was well massaged for a change without my bending over the bathtub which happens when I wash my hair myself. Then, she corn rowed my hair with some extensions (I think she used Expressions) and I was handed over to Hannah who fixed the closure and the weave. Then, she styled my hair as well. When I was done, I was given a personalised delicious cup cake with my name on it (how cute is that!!) but I was so hungry I did not even take a picture (sorry guys!!) and I was given a loyalty card as well. To say I was impressed with the outcome of my hair and Honey Hand Salon as a whole is a major understatement. I was bowled over and I would definitely be returning again because that's how amazing they are. It was a little bit more expensive than an average London salon but my hair was properly laid, guys!! I really love it and that's what I have been rocking since. I may do a post on how to take care of your weaves.
I hope you have enjoyed this little update and I apologise for not posting really nice pictures. I literally took them off my phone and my Instagram. I hope you have all had an amazing weekend... I know i did.. Cheers to Monday :-)...See you in my next post...xx ..toodles.
Labels:
Afro
.
brazilian weave
.
closure
.
Hair
.
hair care
.
honeyhand salon
.
khairmax
.
protective style
.
TWA
.
Weave