Boots No 7 Cleansing Brush Review


Hi My Lovelies,
I am quite surprised that I have not posted the review of this cleansing brush despite having it for over two months*gasps* Well, if you live in England, I am pretty sure you may have heard of the Boots No 7 Cleansing Brush which is basically a cleansing brush for the face to rid it from all kinds of impurities, dirt and makeup. I have had my eyes on the Clarisonic Cleansing System for years but it's quite expensive  and although I am not one to spare the pennies when it comes to skin care, the Clarisonic is still out of my budget. I have always seen the No 7 Cleansing Brush in Boots but I was not convinced. Towards the end of last year, my skin was playing up a little and I decided to close my eyes and purchase this brush. I convinced myself that I needed to try out a cheaper alternative to the Clarisonic Mia if I eventually decided to purchase it.


Packaging
It's a pretty simple packaging which houses the Cleansing Brush itself, a brush head, two batteries and a manual. Nothing too fancy and it also comes with a 2 years warranty which I think is a good touch . The brush in itself is a good size for the average hand which is fantastic as I don't want to be lugging around something heavy across my face every day. The battery section is well protected with a clasp which prevents water from getting into the batteries. It also has one switch for the two settings: Slow (normal cleansing) and Fast (Deep cleansing) and it powers it off and on as well so you can say that button is pretty much multi-functional.


Boots Says:
Boots says this clever cleansing brush gently exfoliates and deeply cleanses the skin getting rid of dirt, makeup and oil much more efficiently than the normal cleansing with your hands will do and I absolutely agree with them. My face feels really clean and soft and it is very easy to use.

Application
I use this with my favourite cleanser which is the SK:N Vitamin Rich Cleanser for Oily Skin and they are amazing together. I always do the double cleanse which is simply removing my makeup  initially with a cleansing wipe (I use Simple Skincare Wipes) or Bioderma (Micellar water)  before going in with my cleanser. Next, I dampen my face with some water, wet the brush with some water, massage my cleanser on my face (not the brush unless you want it splashing everywhere), switch the button and cleanse across my face. I do each section for approx 20 seconds starting with my cheeks, forehead and chin. I am usually done within a minute or so. I wash my brush off any makeup and rinse my face. Viola!!! I do this everyday and night. Some people only use this every other day or a few days in a week but I have used mine twice a day and my skin has been loving it.

Cost
It cost about £24.95 and I actually purchased it for that amount without any discount which is really strange or shows how desperate I was at the time I got it. Normally, I would always wait for any discounts and Boots is very good with their £5 Vouchers off  No 7 Skin Care. They sometimes even offer 3 for 2 on their range which makes this brush even cheaper. If you want to buy this and you are not desperate, it's best to wait till they have their offers on so you can get it cheaper.

Results
I saw a difference to my face after the first use. Yes, I am never one to believe in hypes of products but it is so true. Before this brush when I was using my hands only for cleansing, there was always a residue of makeup still left when I used my cotton pad and toner. Now, not a single trace of makeup is left and it is truly amazing!! It really does take off every makeup with it rotating brush action which Boots claim cleans 4 times better than just using your mere fingers/hands to cleanser. My skin feels very soft and smooth to touch and I cannot imagine not using this any time I wear makeup. Even when I don't wear makeup, I still love to use it as it also feels like a mini spa and massage to my face. The most amazing difference I have seen is with my blemishes/hyper pigmentation which has started fading thanks to this brush, the Dr Organic Vitamin E range (already reviewed here) and the SK:N Vitamin Rich Cleanser with Glycolic Acid (review up soon). This brush facilitates fading away these dark blemishes by encouragin exfoliation of the skin around the hyper pigmentation which encourages cell renewal and regeneration of new skin. It also prevents me from breakouts which have been caused by makeup residue still left on my skin when I was just using my hands for cleansing.

Cons
1. It does not have a rechargeable battery so you have to buy batteries for it at least every two months or so if you use it everyday.
2. It does not have a stand which means you have to leave it lying down either on a towel or wherever you like
3. Still along point 2, the brush head does not have a cover which means it is exposed and can attract dust and germs flying around if you leave it as it is.
4. It is not readily available in many countries; I think you can buy it in the USA but I am not sure where else it can be bought apart from online assuming the shipping is ok.
5. Still on its limited availability; the brush heads are also not readily available in fact some smaller Boots don't even stock it which is pretty annoying.
6. Some people may feel the bristles of the brushes are a little obtrusive to their skin especially those with sensitive skin.


Verdict
Despite all the cons listed above, this has to be one of my favourite purchases in 2013 and I adore this brush and it has made a massive difference to the skin on my face. I always look forward to using this brush every day; it's like my little spa/relaxation time. Also, the rotating action is very good in promoting blood circulation to the skin cells around the face which in turn promotes cell turn over and leaves the skin looking plump and smooth. I will definitely repurchase this if it ever gets damaged or maybe I can try out the Clarisonic when I have saved up more. See you in my next post.. .x

Weekend Post #4- The Photography Show Birmingham March 1- 4 2014


Hi Me Lovelies,
I am pretty sure if you are a regular reader of blogs, you definitely appreciate good pictures ( I think). Even if you are not a blogger but you have several social media platforms like Instagram, Twitter, Facebook, etc then I am sure you love pretty pictures and most importantly, you are keen to learn how to take stunning photos. Here's the good news, The Photography Show* is taking place in Birmingham which I think is an amazing choice of venue as it is quite central and easier to get to than London. But let me fill you in with the details:


What is The Photography Show?
The Photography Show is produced by Future, the international media group and world-leading photography publisher. Side Note: Future has also teamed up with Handpicked Media and their new collaboration is now called Handpicked Future. The Photography Show was created when the peeps at Future realised that there was no annual event on a national scale aimed specifically at the imaging community which is virtually anyone who uses social media platforms that share photos-which is me, you and almost everyone. The Photography Show is aimed at bridging this gap.


Who can attend?
Absolutely everyone. If you have a an interest or love for photographs, then this show is for you. If you are a blogger, you definitely need to be at this show because you get to learn how to make the best use of your camera (be it DSLR, compact, Bridge camera and even your iPhone). You also get to network with other bloggers and photographers which I think is very important in the blogging community. Even if you are not into photography, it is going to be a fun show where you can relax, network and get your pictures taken.


What's happening at the show?
A lot. I doubt if I can cover everything that is going to happen on a blog post but I can share a few highlights of the show.
  • You get to hear from some of the world's renowned photographers like Joe McNally, Rankin and Steve McCurry
  • There are over 200 exhibitors at the stand and some of them include Adobe, Carl Zeiss, Canon, Nikon, FujiFilm, Olympus, Samsung, Hasselblad and over 150 more exhibitors. This also means there may be some juicy discounts and free tutorials for using your camera and accessories. Find the full list of exhibitors here
  • A workshop (Mollie Takes) brought to you by Mollie Makes and powered by Canon which is perfect for bloggers, Etsy Store owners and anyone who wants to have some fun. You can learn some essential skills and gain the confidence to switch from the reliable auto setting on your camera to manual bespoke settings.
  • Catwalk-An opportunity to get up, close and personal with fashion, portrait and wedding photography.
  • Student Conference: To provide students the vital information they need to turn their photography courses into budding careers.
  • DIY Mounting Workshops where you can learn how to mount and frame your own pictures.
  • On Stand Programmes where there are more free photography training and friendly advice brought to you by the exhibitors, sponsors and partners of The Photography Show.*£10 per session*


Venue and Time of The Photography Show
The amazing thing is it is being run over 4 days so there is no excuse not to attend. The show is on from 1-4 March 2014 in the NEC Birmingham B40 1NT. Various programmes will vary on different days which is why it is important to check the website for the programme of the day. See link to the full programme of the event. It would take place on the 1-4 March 2014 from 10am -6pm on Saturday and Sunday (1-2 March) while it starts from 10am and ends by 5pm on Monday and Tuesday (3rd and 4th March 2014). Details for the venue, timings, accommodation, parking and map can be found here.
Cost/Tickets
The tickets for the show cost £13 only per day which I think is reasonable given the wealth of information and access to wide array of exhibitors. The best news is that all readers of Fashstyleliv will get a discount code for their tickets. Instead of buying the tickets for £13, you can get them for £10 and there is a special code which is "FUTHND142014" which you can use when purchasing your ticket.
Link to purchasing your ticket can be found here.  You can also upgrade your ticket by adding extra workshops to it by following this link.


I am definitely excited about this show because I love photography and I may purchase a new camera if there are good discounts there. I suspect I will be there on the Saturday (1st March 2014) which is the first day of the show so if you are there, please pop over and say hi.  The Hashtag for the event is #photoshow2014 and their twitter handle is @ukphotoshow. I hope to see you all there...see you in my next post...x

*PR post- written as a member of the blogging community of the HandPicked Future Team for which I also received free tickets to attend the show.
*Photocredits: The Photography Show Website

Weekend Post #3: The Most loved Techy Gadgets

Hi My Lovelies,
I am pretty sure you had a lovely weekend and you are sad it's over (or maybe it's just me). I always have a moan every Sunday evening/night because it means the weekend is over and it's time to get back to work. Even though I enjoy my job, I love the weekends more...hahaha. I thought I should share my favourite gadgets since this year which I am sure you may have already spied on here in a few posts.

 iPad Mini with Retina Display
This is my new obsession and it was a birthday gift from le bf. I am seriously obsessed with my iPad Mini and I love it because it is just the perfect size for me. I am not really a fan of the normal iPad because I feel it's not really portable. Ever since I joined the Apple family by getting my iPhone last year, I have nurtured our "relationship" by actively lusting after all other Apple products and the addition of this iPad has even strengthened my love for Apple Products. My iPad mini acts like a small laptop for me because I use it for almost everything I would normally do on my laptop although it is limited in a few ways. Work wise, I use it for emails, creating documents, using the internet and logging on to various work systems. Fun wise, it's amazing as it's a full-on entertainment device/gadget for me. I have my music, videos, pictures and games on it. Most importantly, I have downloaded various apps which are useful for blogging, photography, games, devotionals, etc. The picture quality on the iPad mini with Retina Display is totally out of this world and I am so glad I have this particular one because everything looks amazing on it. Browsing on it is an absolute dream because everything is so crisp.  I can't get enough of it and if you want to see some apps I have on it, leave me a comment and I will write up a separate post on it.


Logitech Ultra Thin Keyboard Folio for iPad Mini
I am more than glad that the bf also got me the Logitech keyboard to go along with my iPad Mini. I personally think it heightens your experience on your iPad because the keyboard converts your iPad to small laptop or small Mac. I absolutely love it. The good thing about this keyboard is that it also doubles up as a case for your iPad and it's so compact. The keyboard is specifically created for the iPad which means the iPad fits really snugly inside the case. It comes with its USB cable so you can charge it on your laptop but to be honest, I have only charged it a few times as it holds its charge for a really long time which is pretty impressive. It is connected to the iPad via Bluetooth and it also has a magnetic casing which automatically puts your iPad to sleep once you close it. I love typing on this dainty keyboard and it makes replying emails even easier for me. I have also typed many blog posts on this keyboard and i just love how easy it makes blogging on the go. The keyboard also acts as a stand which you can mount so you type easily and you can also watch any films, videos or whatever you fancy easily. The only downside is it does not have different positions as a stand so it's pretty much one incline. It's actually okay but if you like to have a choice with the stand position, then it may be problematic.


These two gadgets make me so happy and I use them everyday. I hope you have enjoyed this post and
if you would like an in depth review of any of these gadgets, then leave me a comment and your wish will be my command. Have a beautiful week ahead....x

Chanel Les Beiges Healthy Glow Sheer Powder No 50


Hi My Lovelies,
I have recently made a very naughty purchase. I am not sure what possessed me but I am nowhere near sorry. I classify this as a naughty purchase because I was on my way to buy my beloved MAC Studio Fix Powder (reviewed here) and I found myself being distracted by the beautiful Chanel Counter and the sales lady caught my lingering look and next thing, I knew I was colour/shade matched, money changed hands and this beauty was in my stash..It all happened really fast. But...I don't regret it because I really like it and it's like a nice present to myself. This is my first Chanel purchase so I am very excited and who knows how many more Chanel products will be finding its way to my stash. To further facilitate this purchase, I had a 10% discount which is amazing especially as Chanel never does discounts so I was well chuffed!!.With the discount, how could I say no?


Packaging
I am not even going to lie; the packaging was my major reason for purchasing this powder in the first place (before I fell in love with it) because it is so, so pretty. It defies the usual Chanel classic black packaging by taking up a lovely beige colour which is in line with the name- Les Beiges. As usual, it also has the Chanel logo in from of the compact and the pouch. Chanel definitely has one of the best luxury packages out there but they better be the best seeing that their products are on the pricey side.

Contents
It comes in a beige outer packaging which houses the velvet (or is it suede) black pouch with the Chanel logo on the outside. Inside this sexy pouch is the Chanel Les Beiges compact which houses a mirror, a half moon brush and of course the powder itself. I adore the packaging but it definitely has one flaw which is quite annoying-the Half moon brush is separated from the powder by a flimsy black plastic lid. This is very impractical because you have to be flicking between the lid and the brush if you want to apply this on the go. I have decided to discard the both the brush and plastic lid for now because it makes everything too cumbersome. I apply this with a my Black Opal Mini Kabuki Brush featured here.

Chanel Says:
This creation of this powder is inspired by the passion for freedom of Gabrielle Chanel. Les Beiges was created to reveal the healthy glow of each woman and provide a sensation of lightness, well-being and freshness. The finely milled, light weight and antioxidant powder shields the skin from environmental stress and sunlight thanks to its SPF 15/PA +++sun filter.

The Powder Compact
 The Les Beige Healthy Glow Powder can be used in a variety of ways to enhance, tint, bronze, sculpt and highlight depending on how you choose to use it and what shade you buy. For example, you can buy a shade darker than your skin tone to use as a bronzer or as a sculpting powder. I don't imagine buying more than one of this powder at this time though. For me, I use it to enhance my complexion, as a mattifying powder and for a healthy glow which is its main selling point. I picked up the shade no 50 which was the darkest shade on the counter. I believe they do no 60 and 70 in some other countries or at the Airport.

Coverage
From the name, you don't need a soothsayer to let you know it is a sheer powder which offers light to medium coverage at the most. I don't mind this at all because my foundation is medium to full coverage so a sheer powder just gives me a natural glow as opposed to a caked up face. To be honest, I am quite impressed with the coverage it offers because when I was saw it was sheer; I thought of the worst scenarios but I am quite pleased with it. In terms of its mattifying power, it easily transforms the face with a few brush sweeps which actually stays put for a couple of hours depending on your skin type.

How I use it
I reserve this strictly for touch ups when I am on the go :-). Recently, I have been using this as my main powder and I really like the results especially when paired with my Clinique Anti-Blemish Foundation (review up soon). I use this with my Black Opal Mini Kabuki Brush. Having said this, I am secretly glad the Chanel Kabuki Brush created specially for this powder was out of stock as I may have bankrupted myself purchasing it if it was not. The sales lady used it on me while trying to match me to a shade and it was the softest, luxurious brush I had ever used and laid my eyes on.

Cost
Retails price is £38 and I think that has to be the most expensive makeup item I have ever bought. It's ridiculous but with my 10% discount; I got this for £34.20 which is not a massive saving but it's definitely more forgiveable in my own opinion. My MAC Studio Fix Powder costs £21.50 so this was an extra £13 or so which is a lot but I will classify this as a birthday gift to myself :-). If you want a bigger discount, buy it in Duty Free in Airports where you get it for 20% cheaper. I may still get my MAC Studio Fix just because it's still one of my practical favourites


Cons
1. I am not a fan of the half moon brush and flimsy plastic lid separating it from the compact; it's cumbersome and impractical and one would think Chanel will create a separate compartment underneath the compact.
2. If you are after a medium/full coverage powder, look elsewhere as this is a sheer powder.
3. It is expensive as expected with most high end products.
4. The shades/colours are very limited especially for ladies with more yellow and darker skin tones.

Verdict
I love this powder and I am really happy with my purchase. Usually, before I commit to buying any product especially if it is high end, I read many reviews on different blogs complete with swatches and I also check Temptalia (my favourite blog for swatches) and Makeup Alley (my favourite blog for non-bloggy reviews). When I checked reviews on Makeup Alley for this powder, there was a lot of mixed reviews on it and it looked like people were not really recommending this product. However, I still went ahead to purchase it because I had tested it in store a little while ago and I loved the finish. Asides that, I did not really have very high expectations because I know that expensive does not always equal quality but in this case, I absolutely love this powder and it has to be one of the greatest quality of powders I have tried in a long time. It's always best to form your own opinion after getting opinions/reviews from others; at the end it's your call...that's me getting all philosophical :-). Hope you enjoyed this and see you in my next post..Have you tried any Chanel Products?


Zara Handbag/Purse Haul (Zara Sales)


Hi My Lovelies,
It has been a while since I popped into Zara for any purchases but the recent January sales presented the best time ever to buy some items I had been lusting after when they were full price. I love Zara for their leather goods and accessories especially their handbags because they are of excellent quality and they styles are always on trend. My favourite Zara bag is the Office City  Bag which has been featured here on the blog and is on its way to being two years old. I am sure you are already fed up with me mentioning my birthday was in January (sorry guys!! but it's just once a year) and my lovely sister sent me some money to spoil myself with. She always, always spoils and dotes on me and I love her so much. 

Armed with birthday money in tow, I headed off to Zara and I bought a few leather goods and office wear. I actually didn't buy all these bags and purses in one go. The purse and wallet were bought in store while the bags were bought online and all of them together cost less than £30<-----...rewind...Yes, you read right and I was as shocked as you each time I picked up any of these bargains. All the purchases have little stories attached to how I found them. There are all sold out online but I am pretty sure you can ransack your nearest Zara store because these gems were all well hidden in some less popular Zara stores.


Zara Wallet with Pull-Out Card Holder (Sold out Online)
This wallet makes me so excited because it looks so chic. It's made of Polyurethane which is the same material as the Zara Office City Bag and the two of them together are what dreams are made of- the perfect companions. It comes with a pull out card holder which is very convenient because you can leave it out if you want the wallet to serve as small clutch or you prefer it less bulky. It has a sturdy inner zip and one pocket in front and behind. I just love it and it's very compact; just the way a wallet should be. I found this little gem under a pile of jumpers/knitwear/sweaters in the Zara in Brompton Road near Harrods in London. I can't believe anyone could hide it there but i was sure glad to find it. It cost only £7.99. 


Zara Printed Wallet/Pouch (Sold out Online)
I have always wanted the Whistles Pouch but the smallest size is about £35 and i can never justify at this time in my life spending that much on a small pouch. I sighted this under another pile of clothes in the Zara in Victoria Street London. Seriously, I don't understand why people are hiding these purses but I am happy to find them. I like the prints on it and it just stands out from any wallets or pouches I own; not that I have that much of a collection. This is perfect as a makeup bag because it's very roomy and even has a smaller pocket inside. It comes with a wristlet so it can also serve as mini clutch for those casual evening outings where you can't be bothered with a normal sized bag. I got this for £3.99 which I think is such a bargain given the quality and trendy style it comes in.


Zara Shopper Bag with Pocket -Burgundy (Sold out Online)
This was an online purchase and I have never been so pleased with it. I was in need of a new bag and I wanted one that was not black just to infuse some colour into my wardrobe. One lazy day, I was nosing around on the Zara website and I spied its burgundy version. I was intrigued and i quickly added this to my basket because the thing with Zara website shopping (especially with sales) is that many other ladies are shopping as well and there is a high chance that if you don't act fast, the item will never make it to check out. I tried to buy two but I was not fast enough and it flashed red that it was sold out. It is very spacious which is why it's called a shopper bag. I am glad it has a zip because I am not a fan of shopper bags without zips; I feel my items are not safe. It has a really deep pocket in front which comes in handy for storing phones, keys, ear phones and just random stuff. Outside is also made of polyurethane but it feels softer than the other bags made from same material. Inside is made of a mixture of Jute and Cotton and it looks like linen a lot. I like the extra touch. It is so large so there is a temptation to over stuff it and trust me it can take a lot of stuff because it is really sturdy. I got this for a bargaini-cious £7.99 :-))


Zara Basic Shopper (Sold out online)
This was a very surprising buy. After my previous bargains on the site, I was on the lookout for more shopper bags and I had checked the website many times already with no luck on sales. So, I entered the word "shopper" in the search box and lo and behold! this little baby flashed across the screen. I was suspicious *narrows eyes* because I was so sure it was going to come up as sold out. I checked and it was not so I swiftly tried to buy two; one for me and one for my sister but that was not to be as expected. So, I had to check out with just one. It was only £7.99. It's a beautiful bag and I can finally give my Zara Office City bag a well deserved rest (or holiday because it would be back soon) and let's face it, the City Bag is quite heavy. A little work out on its own. This Basic Shopper is way lighter and made of the same Polyurethane which looks very much like leather but feels different to leather. It is also very roomy with some pockets inside. 


That's it folks. I am super pleased with all my purchases and I absolutely love them all especially as they were really affordable. Although all these items are sold out online,  if you are near a Zara Store, you might want to pop down there and check for any hidden treasures. See you in my next post...toodles...x


Affordable Valentine Ideas- I Promise Cards


Hi My Lovelies,
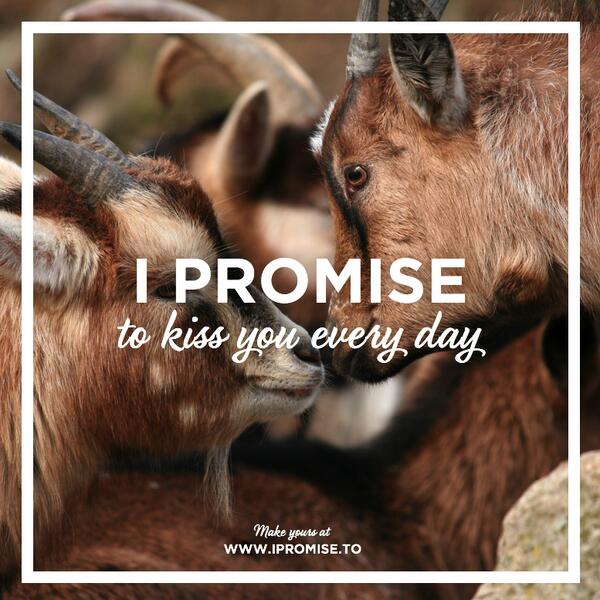
Valentine's day is fast approaching and most shops have taken advantage of this with sales of beautiful flowers, chocolates, perfumes, etc. To be honest, I don't really celebrate Valentine's day, not because I hate it or I am Valentine Grinch but simply because I and the BF celebrate our love at other times of the year when nobody else is celebrating theirs. Yes, we are weird and spontaneous like that. In fact, I and the BF have actually never gone out on Valentine's day because all the restaurants are usually filled up and with this year's valentine's day falling on a Friday, I am pretty sure the whole weekend will be a Valentine's weekend. When it comes to gifts, I prefer something sentimental and fun at the same time which is why I was delighted when I received an email from the lovely PR at I Promise asking if I was willing to trial their bespoke Valentine's gift idea in form of the I Promise Cards...Of course I said yes.


What is I Promise to?
It's a bespoke service that offers a new way to get thoughts across to your loved ones in an easy and beautiful manner. The idea was borne out of a need for the Co-Founder Andrew Deere to get his wife a different gift that stands out in a unique and beautiful way instead of the usual gift of flowers, chocolates, etc. He put together various thoughts and promises (e.g. I Promise to go on a cooking course) into nice small but high quality cards with pictures wrapped in a beautiful box and of course, his wife was absolutely delighted when she received it..The rest they say is history and I Promise was borne.


How does it Work?
Quite simply.  Log on to the I Promise To website. Firstly, you choose what kind of box/case you like which can be either the Royal Blue Case with Gold Foil Lettering or the Letterbox Red with White Foil Lettering. Next, you can either compose a completely bespoke set of promises and thoughts which are exclusive to you and your loved one or choose from an extensive selection of pre-written promises (check out a couple of promises at the end of this post-some are very naughty!!).  There are also some witty pictures to go with each promise or you can upload yours from your own gallery. That's all you do on your own part and they take care of the rest. Of course, you can preview what you have put together before you check out and fill out the delivery details of your loved ones or for yourself so you can present it to them in person (I chose the latter). A beautifully wrapped gift box will be delivered to you or your loved one. Easy Peasy!! If you fancy finding out about any discounts they may have, follow I Promise on their Facebook Page, Google Plus and Twitter.  

     Embedded image permalink

How much does it cost?
I have to say it is very affordable given how unique the concept is. The price range starts from £9.50 and the most expensive is £18.50 which I think is reasonable. This covers/includes delivery charges (if you want a next day delivery-some extra charges will be incurred), the box/case and of course all your bespoke promises in high quality paper. How amazing is that!! If you live outside the UK, this can be delivered to you as well starting from £3.00 which is very affordable for international delivery..

      Embedded image permalink

Who is this for?
I would say everyone. Ladies and gents, anyone really and the good thing is I Promise is not just exclusive to Valentine's day; it can be sent on Birthdays, Anniversaries, Weddings, Christmas or just because..., etc. Most importantly, I don't think you need to have a special occasion to let your loved ones know how much they mean to you. If you find it really hard to be expressive, this is a perfect way to start being expressive without too much effort on your part and I am pretty sure anybody will be very pleased to receive something this special. If you are like me and you are not buying anything expensive this valentine's day but you just want to make a little effort that goes a long way, your answer lies here..Thank me later :-)

Here's some popular promises from Men and Women (a few naughty ones thrown in)


Men’s promises to women
1. To surprise you more
2. To plan more dates
3. To cook you a candlelit meal
4. To give you the keys to my flat
5. To always make you laugh
6. To take you to a hotel for a romantic weekend away/ to go to the airport
7. To run a bath for you when you've had a bad day
8. To say I love you more often
9. To give you a massage
10. To have our honeymoon again


Women’s promises to men
1. To let you do ‘that thing’
2. To try some 50 Shades of Grey stuff
3. To cook you your favourite meal
4. To bring you beer while you watch the football
5. To keep you smiling
6. A weekend away in a foreign city
7. To have your babies
8. To wrap myself up in a bow
9. To travel the world with you
10. To give you a long massage


So, if you are stuck with ideas for Valentine's day or any event and you really want something unique which really stands out, then this is worth a try. Given that it's a few days away, it's best to choose next day delivery. Happy Valentine's day in advance...xx

*I was kindly sent a voucher to try out the I Promise cards from the lovely company. As usual, all views are mine and I was neither compensated to do this review nor obliged to do it rather I really liked the concept and I think you would like it as well :-))*


The Weekend Post #2: Blogging Tips (Behind the Scenes of Blogging)


Hi My Lovelies,
I always get asked every now and then how much work it takes to run a blog and I never have the right answers because blogging could be demanding ( lot of work) or easy (minimal effort) depending on how you look at it. I am in no way an expert but this is just the way i work on this blog which is by no means the perfect way; just what works for me.. So, I decided to share this post on what I do before I publish a blog post.


1. Getting the Idea: I draw inspiration from different things which include magazines, other bloggers, press releases, internet, myself, products, nature, friends, family and you of course (your comments are one of my favourite inspirations). I get inspired and I always try to jot something down even if it's on a small notebook or on my phone or iPad. For example, let's say a friend asked my opinion about choosing the right foundation, I would give my honest opinion and of course I would feel inspired and a blog post will be birthed.


2. Writing the post: If I am really buzzing with inspiration and I have the time, I will whip out a blog post in no time. I write and type very fast (and even faster) when I am in the mood. Most of my posts are done either on the tube, train, bus, at work (during lunch break), on my balcony at home if the weather is fine (I also take pictures here) or just on my bed (my favourite place); I don't have a set time for blogging (I know, I know, I am not very organised) because I have a lot of other things vying for my attention and time. Writing the post is one of the most interesting parts of blogging for me because I love to write :-) which is why sometimes you are all bored to death with my super long posts..sorry!!


3. Photography: This is where it gets a bit technical and complicated. I like to take pictures but it takes a lot of time and a lot of factors influence it with the biggest being the amount of light available especially now that it's winter in the UK with very short day light. I always go crazy with pictures and take a lot then I delete them. Contrary to what people think, I don't own a DSLR camera but I have a point and shoot digital camera (Nikon CoolPix), an iPhone and a Bridge camera. I hope to share a photography post soon. I would like a DSLR camera at some point but my other devices do just fine for now. I prefer to take photos with natural daylight so if the weather is nice, I would take all the photos I may need for a week because if I have photos ready, I can whip out many blog posts.

Unedited                                                                       Edited
4. Editing the Photos: Most of the photos used on here are edited to improve the quality. I love pictures and I always want the best experience for my readers. Editing could take a while especially when you have tonnes of pictures to edit so I always do them in batches. I love editing because the pictures seem to be brought to light instantly which is why I am not too bothered if the initial quality of the picture is not great; I am more concerned with getting a good shot. I don't do heavy editing for the photos because "ain't nobody gat time fo' dat" but I usually adjust the white balance and contrast and that's it. Sometimes, if the lighting is great, I don't really edit, I just auto-adjust and that's all. I don't edit pictures of swatches of makeup of course because I prefer the real/true image to be seen.


5. Arranging/Editing the post: I like this part because it means I am getting to the end goal- publishing!! Here, I just decide what style I want the post to look like. I could either put all the pictures above the actual post and have the blog write up underneath or I just insert the pictures above related headings. It takes a really short time and I actually enjoy this. Whatever I choose, I always choose a nice picture for the heading/post title which is incidentally what is picked up when sharing the blog posts. I also add links if necessary and edit the posts for any errors and spell checks. I italicise and make bold where necessary and add headings.


6. Preview: If you use blogger, you can preview your post while in draft and it shows you how the blog posts look like when it is published which is very handy. I wish life had a preview button so we can preview any decisions we want to make to see how it looks like before attempting it...hehehehe that explains why we are still humans despite all the knowledge we think we know *holds lips and smacks wrist for digressing*. The preview button allows me see the blog post as though I was just a reader like you and I make a few adjustments and add my labels/tags after I am satisfied.


7. Publish and Share: Once I am happy with all the editing, I hit the publish button and it's published. I really feel very accomplished and excited once I hit the button. Then, I proceed to share  on Google, Twitter, Facebook, Reddit and Glipho. Occasionally, I would share on Instagram and other forums. For more ways to share, I have a post here which is helpful for sharing blog posts. If I see an error, I am always happy to go back and tweak it. Sometimes, I am naughty and check how many views the post has..very naughty I know but it does make me feel encouraged and if I get comments, it makes my day and I always reply because I love the interaction.


That's it folks. I know it seems like a lot of steps but step 5, 6 and 7 take just a few minutes. The most time is spent in steps 2, 3 and 4. More on 3 and 4 which is photography and editing. Sometimes, I do these steps over a few days while on other days when I am less busy I can actually do all steps in a day which I prefer. The amount of blog posts I have in my draft is ridiculous but I am getting to whip them out soon.. I hope you have enjoyed this little behind-the-scenes and if you would like more of this kind of posts, let me know...toodles... xx


© FashStyleLiv All rights reserved . Design by Blog Milk Powered by Blogger